![]()
![]()

ViennaPS is a header-only C++ library for topography simulation in microelectronic fabrication processes. It models the evolution of 2D and 3D surfaces during etching, deposition, and related steps, combining advanced level-set methods for surface evolution with Monte Carlo ray tracing for flux calculation. This allows accurate, feature-scale simulation of complex fabrication geometries.
ViennaPS supports both physical process models and fast emulation approaches, enabling flexible and efficient development of semiconductor processes. It can be easily integrated into existing C++ projects and also provides Python bindings for use in Python-based workflows. The library is actively developed and continuously improved to address the needs of process and topography simulation in microelectronics.
To install ViennaPS for Python, simply run:
pip install ViennaPSTo use ViennaPS in C++, clone the repository and follow the installation steps below.
For full documentation, visit ViennaPS Documentation.
Note
ViennaPS is under heavy development and improved daily. If you do have suggestions or find bugs, please let us know!
Releases are tagged on the master branch and available in the releases section.
ViennaPS is also available on the Python Package Index (PyPI) for most platforms.
-
Linux (g++ / clang)
-
macOS (XCode)
-
Windows (Visual Studio)
- C++17 Compiler with OpenMP support
-
- ViennaHRLE
- VTK (9.0.0+)
-
- Embree (4.0.0+)
-
pybind11 (3.0.0+, only for building Python libs)
The CMake configuration automatically checks if the dependencies are installed.
If the dependencies are not found on the system, they will be built from source. To use local installations of the dependencies, the VIENNAPS_LOOKUP_DIRS variable can be set to the installation path of the dependencies.
Note
For more detailed installation instructions and troubleshooting tips, have a look at the ViennaPS documentation.
ViennaPS is a header-only library, so no formal installation is required. However, following the steps below helps organize and manage dependencies more effectively:
git clone https://github.com/ViennaTools/ViennaPS.git
cd ViennaPS

cmake -B build && cmake --build build
cmake --install build --prefix "/path/to/your/custom/install/"
This will install the necessary headers and CMake files to the specified path. If --prefix is not specified, it will be installed to the standard path for your system, usually /usr/local/ on Linux-based systems.
The Python package can be built and installed using the pip command:
git clone https://github.com/ViennaTools/ViennaPS.git
cd ViennaPS

pip install .
Some features of the ViennaPS Python module depend on the ViennaLS Python module. You’ll need to install ViennaLS separately — instructions are available in the ViennaLS GitHub repository. Note: A locally built ViennaPS Python module is typically not compatible with the ViennaLS package from PyPI. For details and troubleshooting, see this guide.
The 2D version of the library can be imported as follows:
import viennaps2d as vpsIn order to switch to three dimensions, only the import needs to be changed:
import viennaps3d as vpsWe recommend using CPM.cmake to consume this library.
-
Installation with CPM
CPMAddPackage("gh:viennatools/[email protected]")
-
With a local installation
In case you have ViennaPS installed in a custom directory, make sure to properly specify the
CMAKE_PREFIX_PATH.list(APPEND CMAKE_PREFIX_PATH "/your/local/installation") find_package(ViennaPS) target_link_libraries(${PROJECT_NAME} PUBLIC ViennaTools::ViennaPS)
In order to save build time during development, dynamically linked shared libraries can be used if ViennaPS was built with them. This is done by precompiling the most common template specialisations. In order to use shared libraries, use
cmake -B build -DVIENNALS_PRECOMPILE_HEADERS=ONIf ViennaPS was built with shared libraries and you use ViennaPS in your project (see above), CMake will automatically link them to your project.
As of version 3.4.0, ViennaPS supports GPU acceleration for the ray tracing part of the library. This feature is still experimental and may not work on all systems. Details on how to enable GPU functionality can be found in the documentation.
The examples can be built using CMake:
Important: Make sure all dependencies are installed and have been built previously
git clone https://github.com/ViennaTools/ViennaPS.git
cd ViennaPS

cmake -B build -DVIENNAPS_BUILD_EXAMPLES=ON
cmake --build build
The examples can then be executed in their respective build folders with the config files, e.g.:
cd examples/exampleName
./exampleName.bat config.txt # (Windows)
./exampleName config.txt # (Other)
Individual examples can also be build by calling make in their respective build folder. An equivalent Python script, using the ViennaPS Python bindings, is also given for each example.
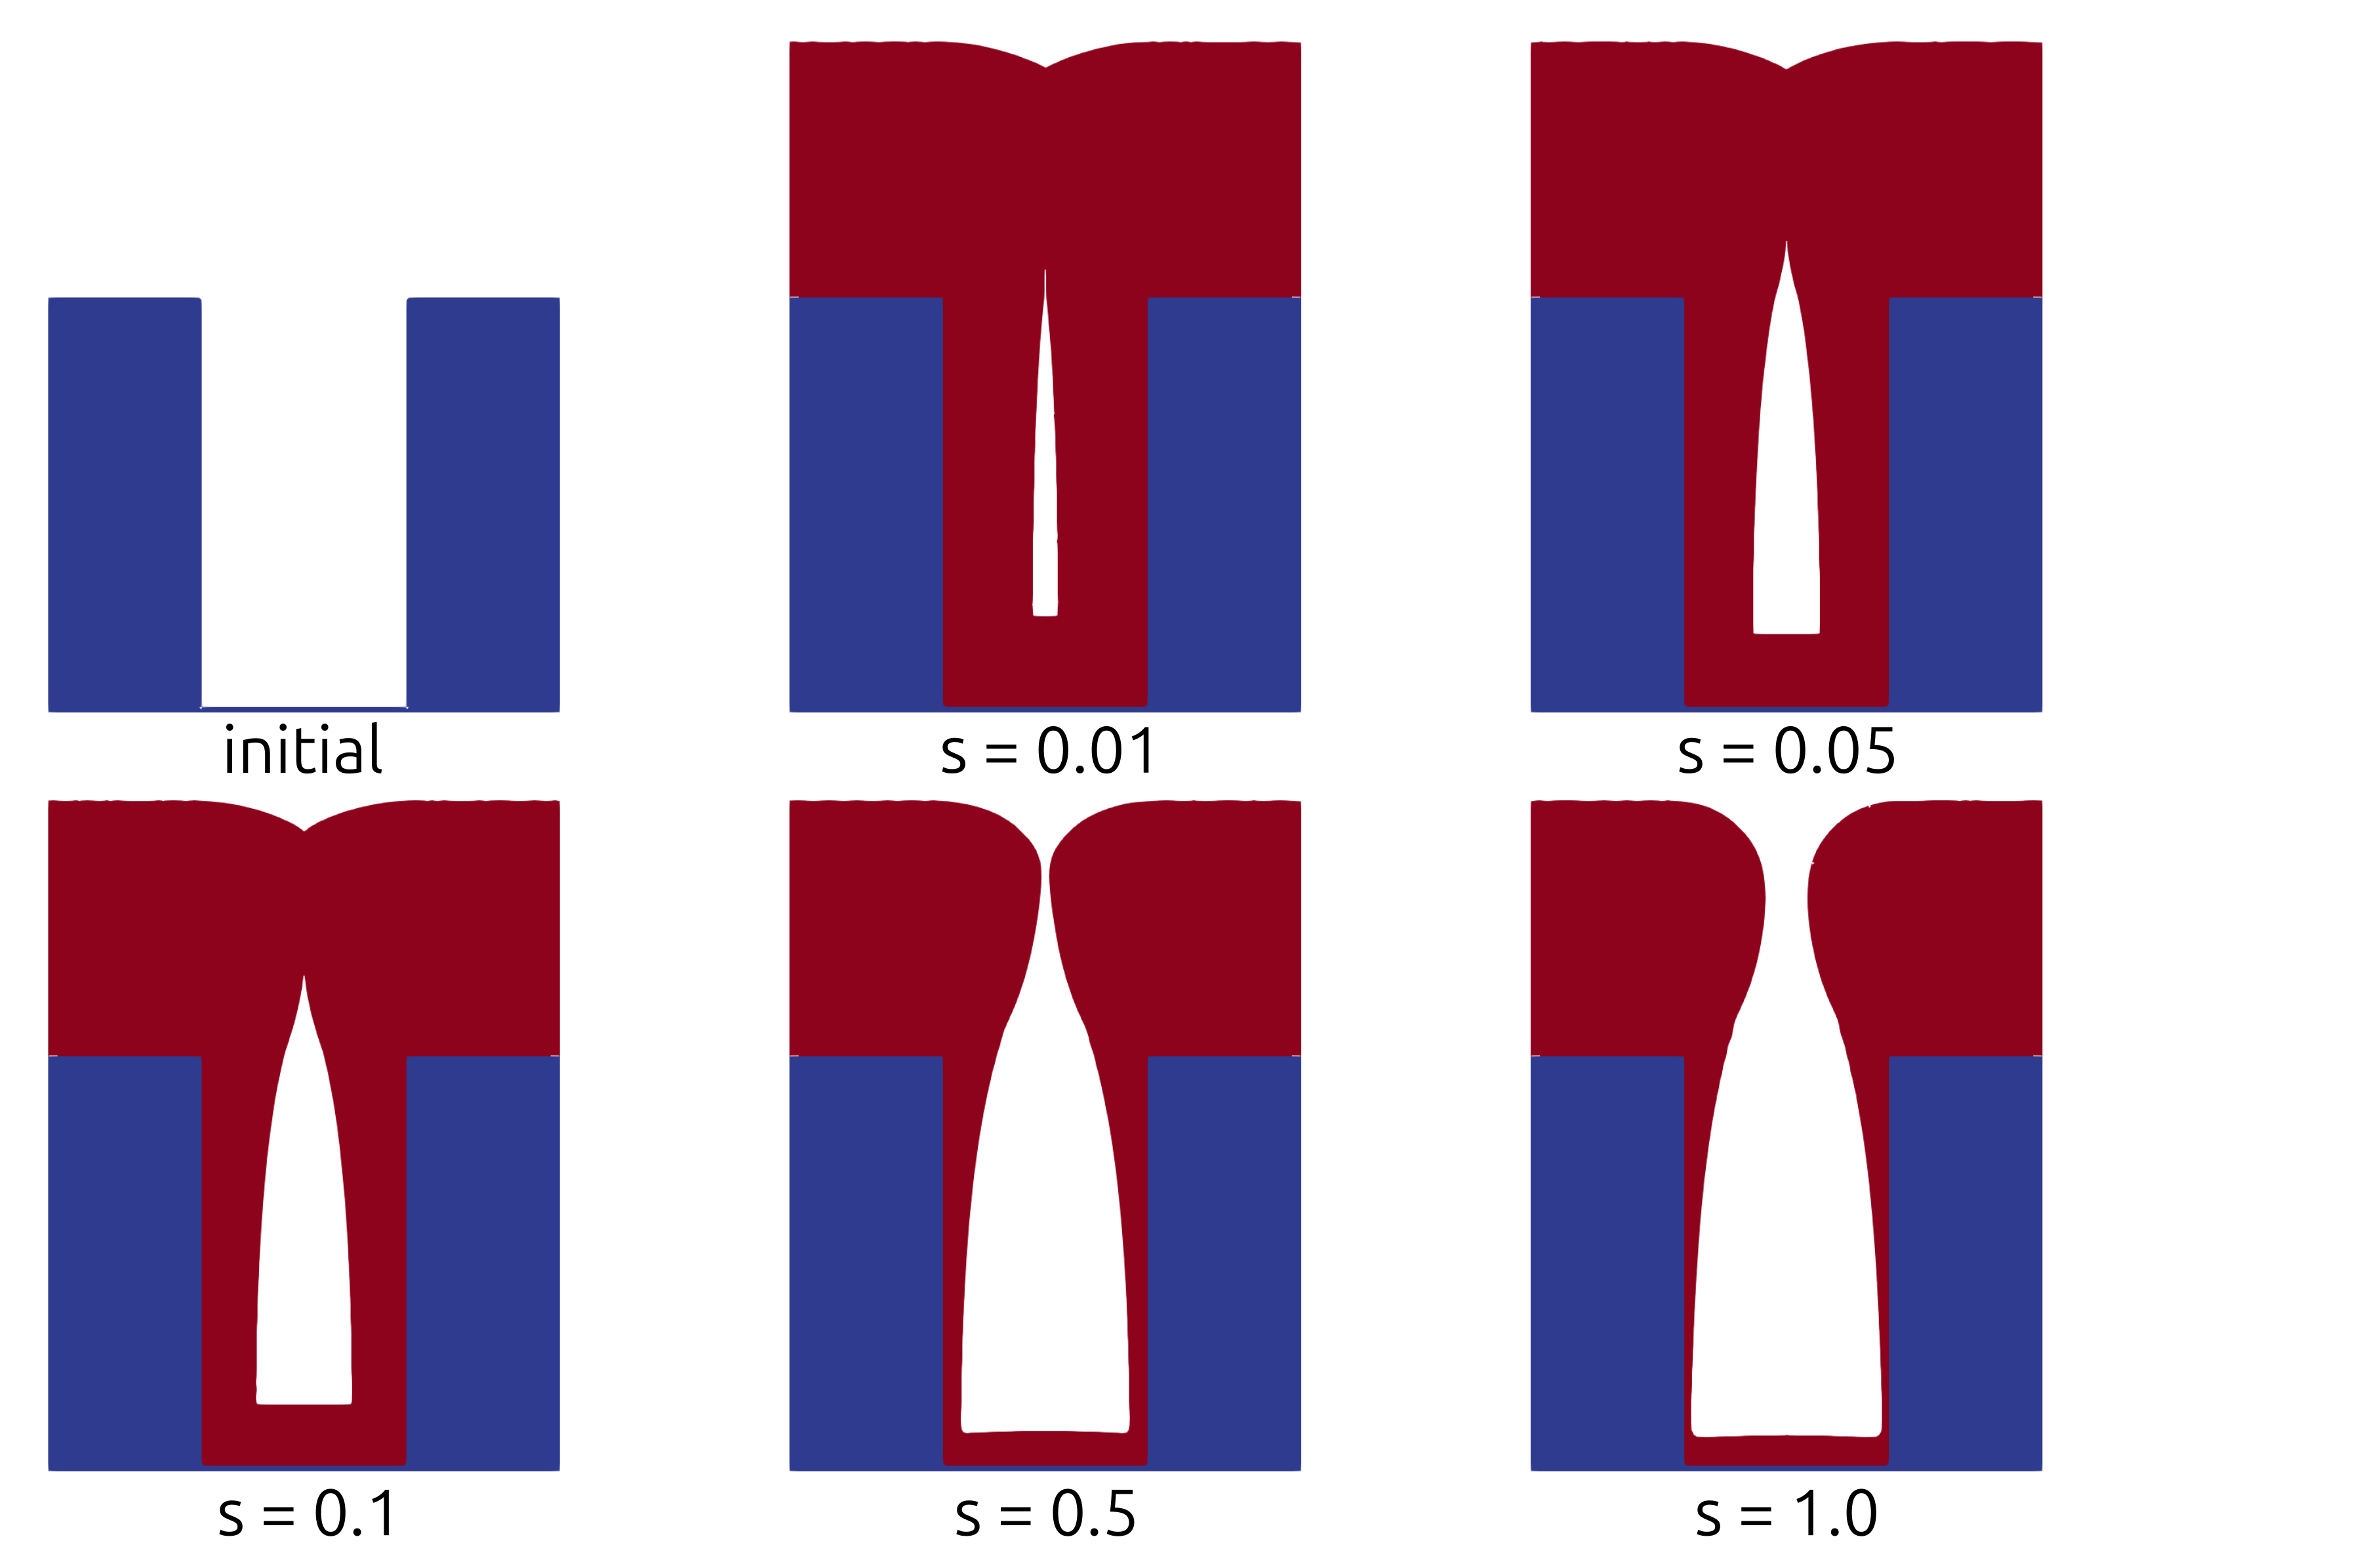
This example focuses on a particle deposition process within a trench geometry. By default, the simulation presents a 2D representation of the trench. Nevertheless, users have the flexibility to conduct 3D simulations by adjusting the value of the constant D in trenchDeposition.cpp to 3. Customization of process and geometry parameters is achieved through the config.txt file. The accompanying image illustrates instances of the trench deposition process, showcasing variations in the particle sticking probability s.
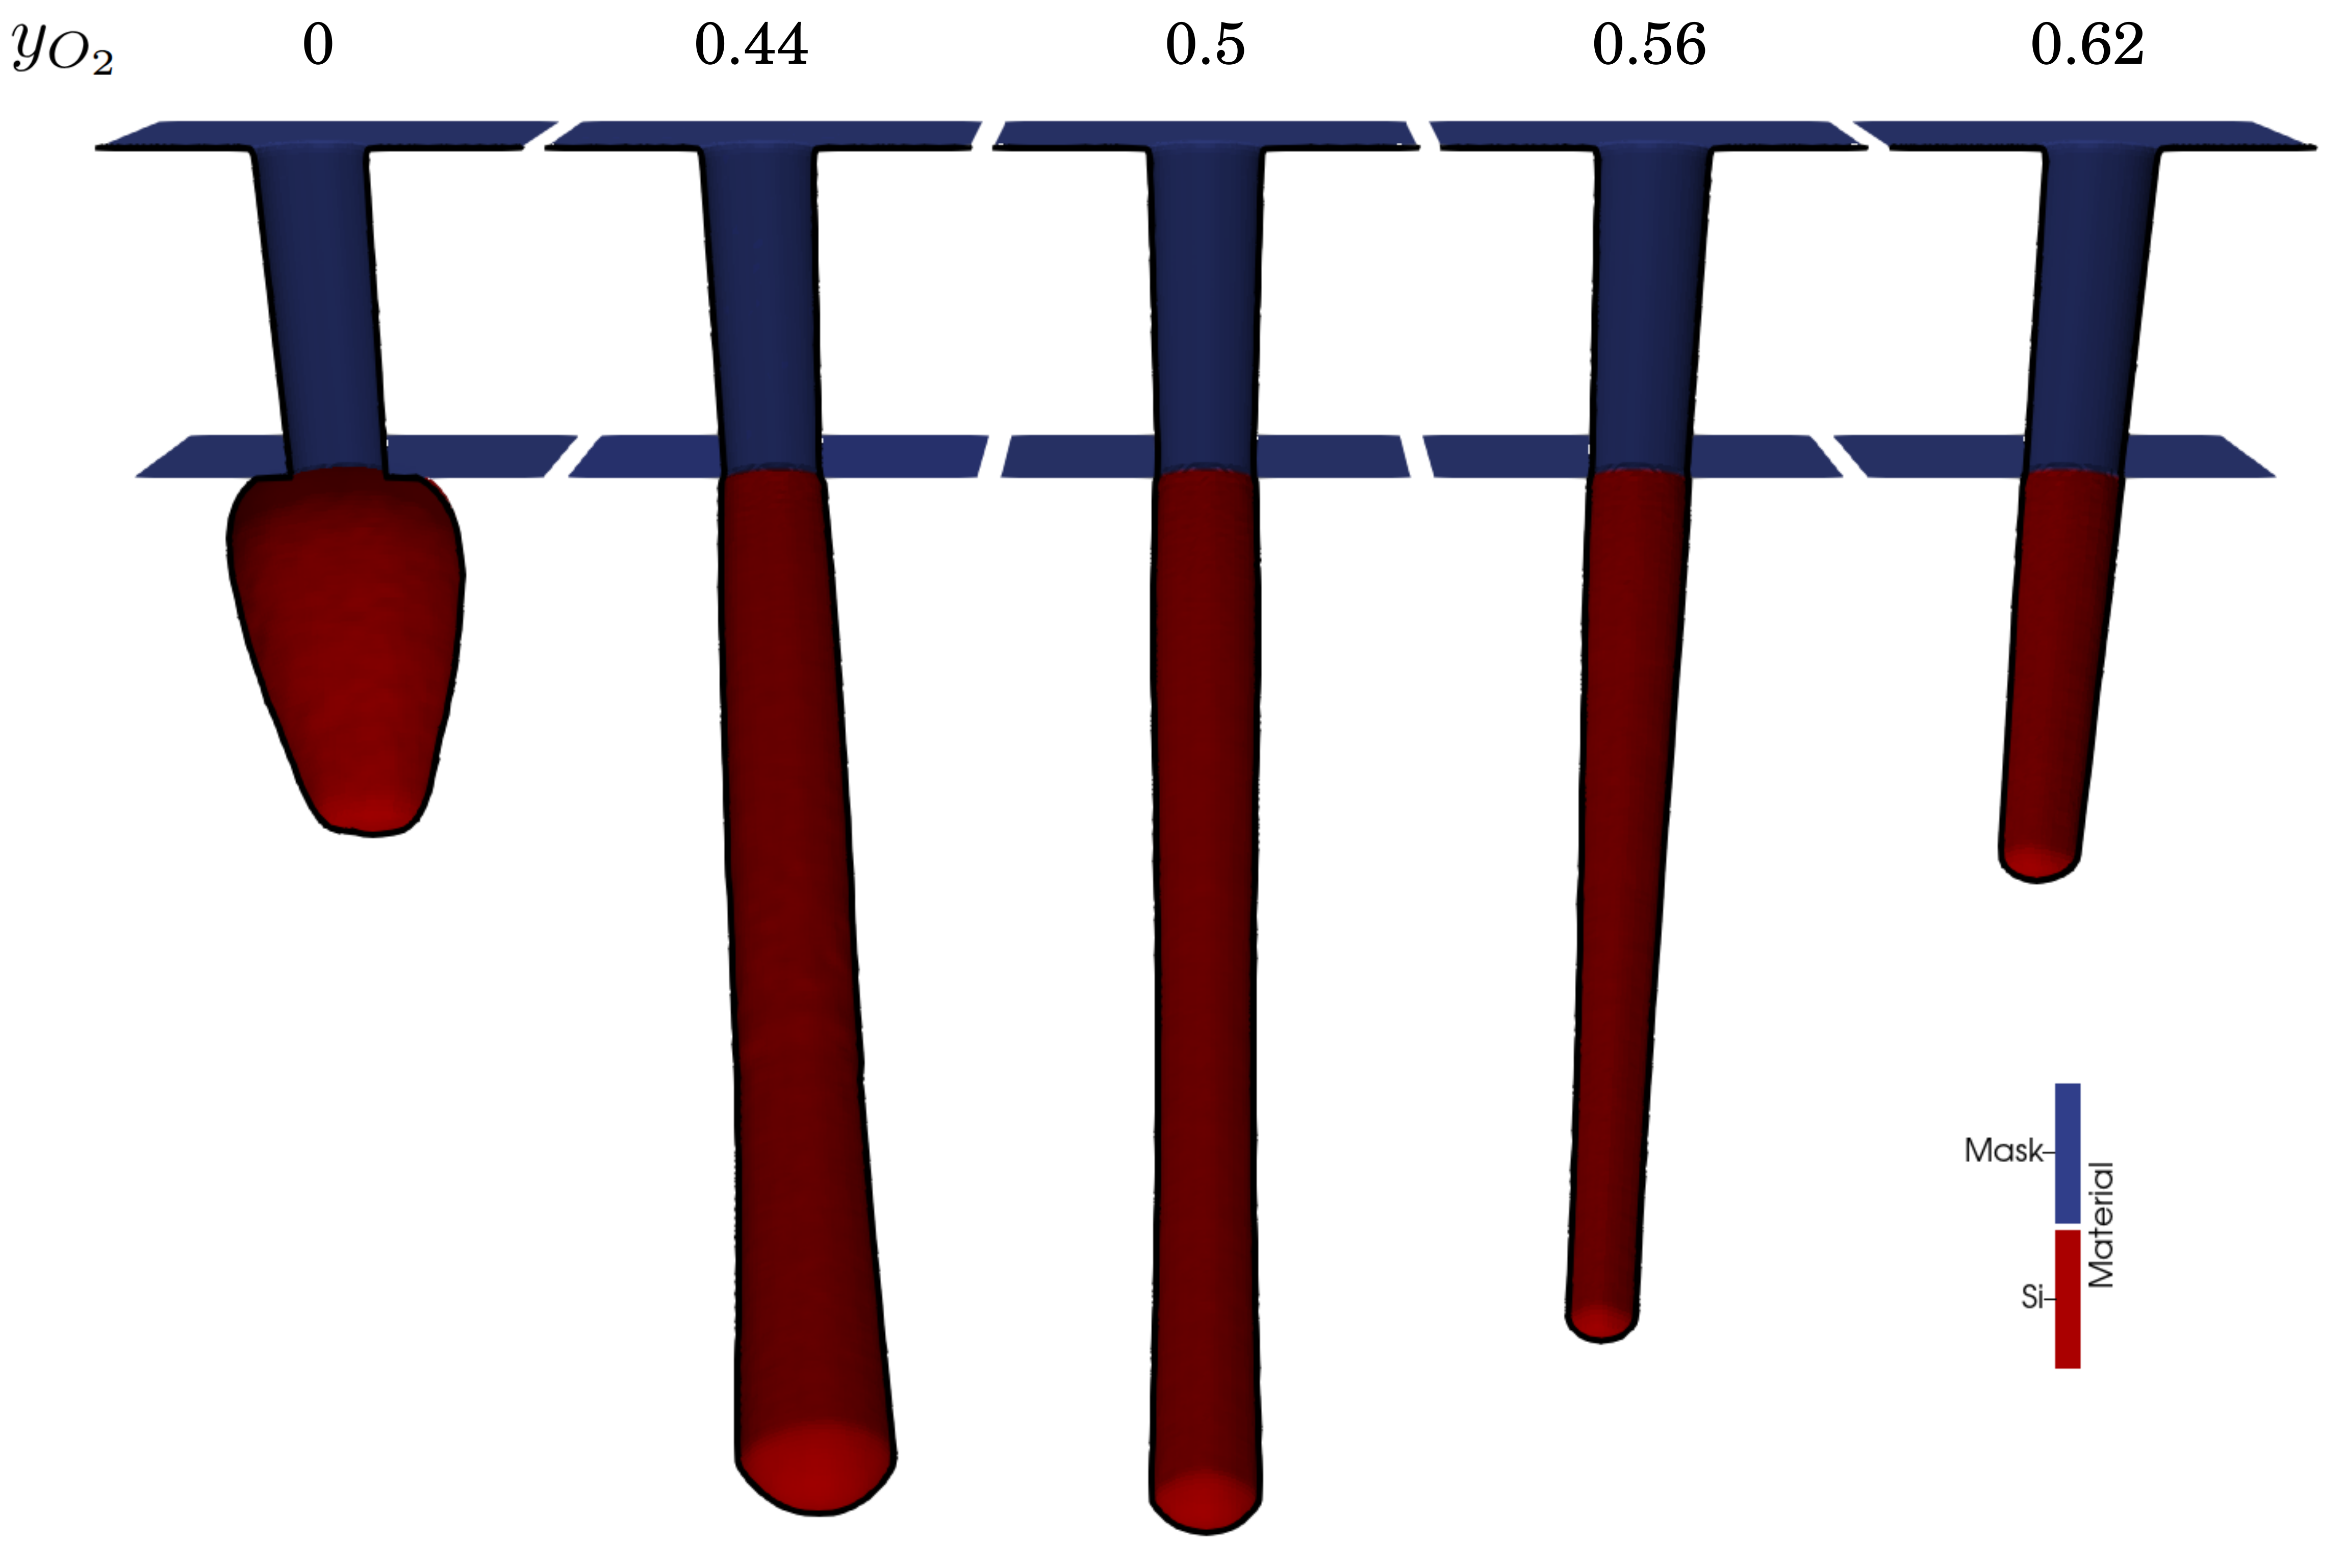
This example demonstrates a hole etching process with a SF6/O2 plasma etching chemistry with ion bombardment. The process is controlled by various parameters, including geometry and plasma conditions, which can be adjusted in the config.txt file.
The image presents the results of different flux configurations, as tested in testFluxes.py. Each structure represents a variation in flux conditions, leading to differences in hole shape, depth, and profile characteristics. The variations highlight the influence of ion and neutral fluxes on the etching process.
Note
The underlying model may change in future releases, so running this example in newer versions of ViennaPS might not always reproduce exactly the same results.
The images shown here were generated using ViennaPS v3.6.0.
This example compares different approaches to simulating the Bosch process, a deep reactive ion etching (DRIE) technique. The three structures illustrate how different modeling methods influence the predicted etch profile.
- Left: The structure generated through process emulation, which captures the characteristic scalloping effect of the Bosch process in a simplified yet effective way.
- Middle: The result of a simple simulation model, which approximates the etching dynamics but may lack finer physical details.
- Right: The outcome of a more physical simulation model, leading to a more realistic etch profile.
This comparison highlights the trade-offs between computational efficiency and physical accuracy in DRIE simulations.

This example demonstrates the wet etching process, specifically focusing on the cantilever structure. The simulation captures the etching dynamics and the influence of crystallographic directions on the etch profile.

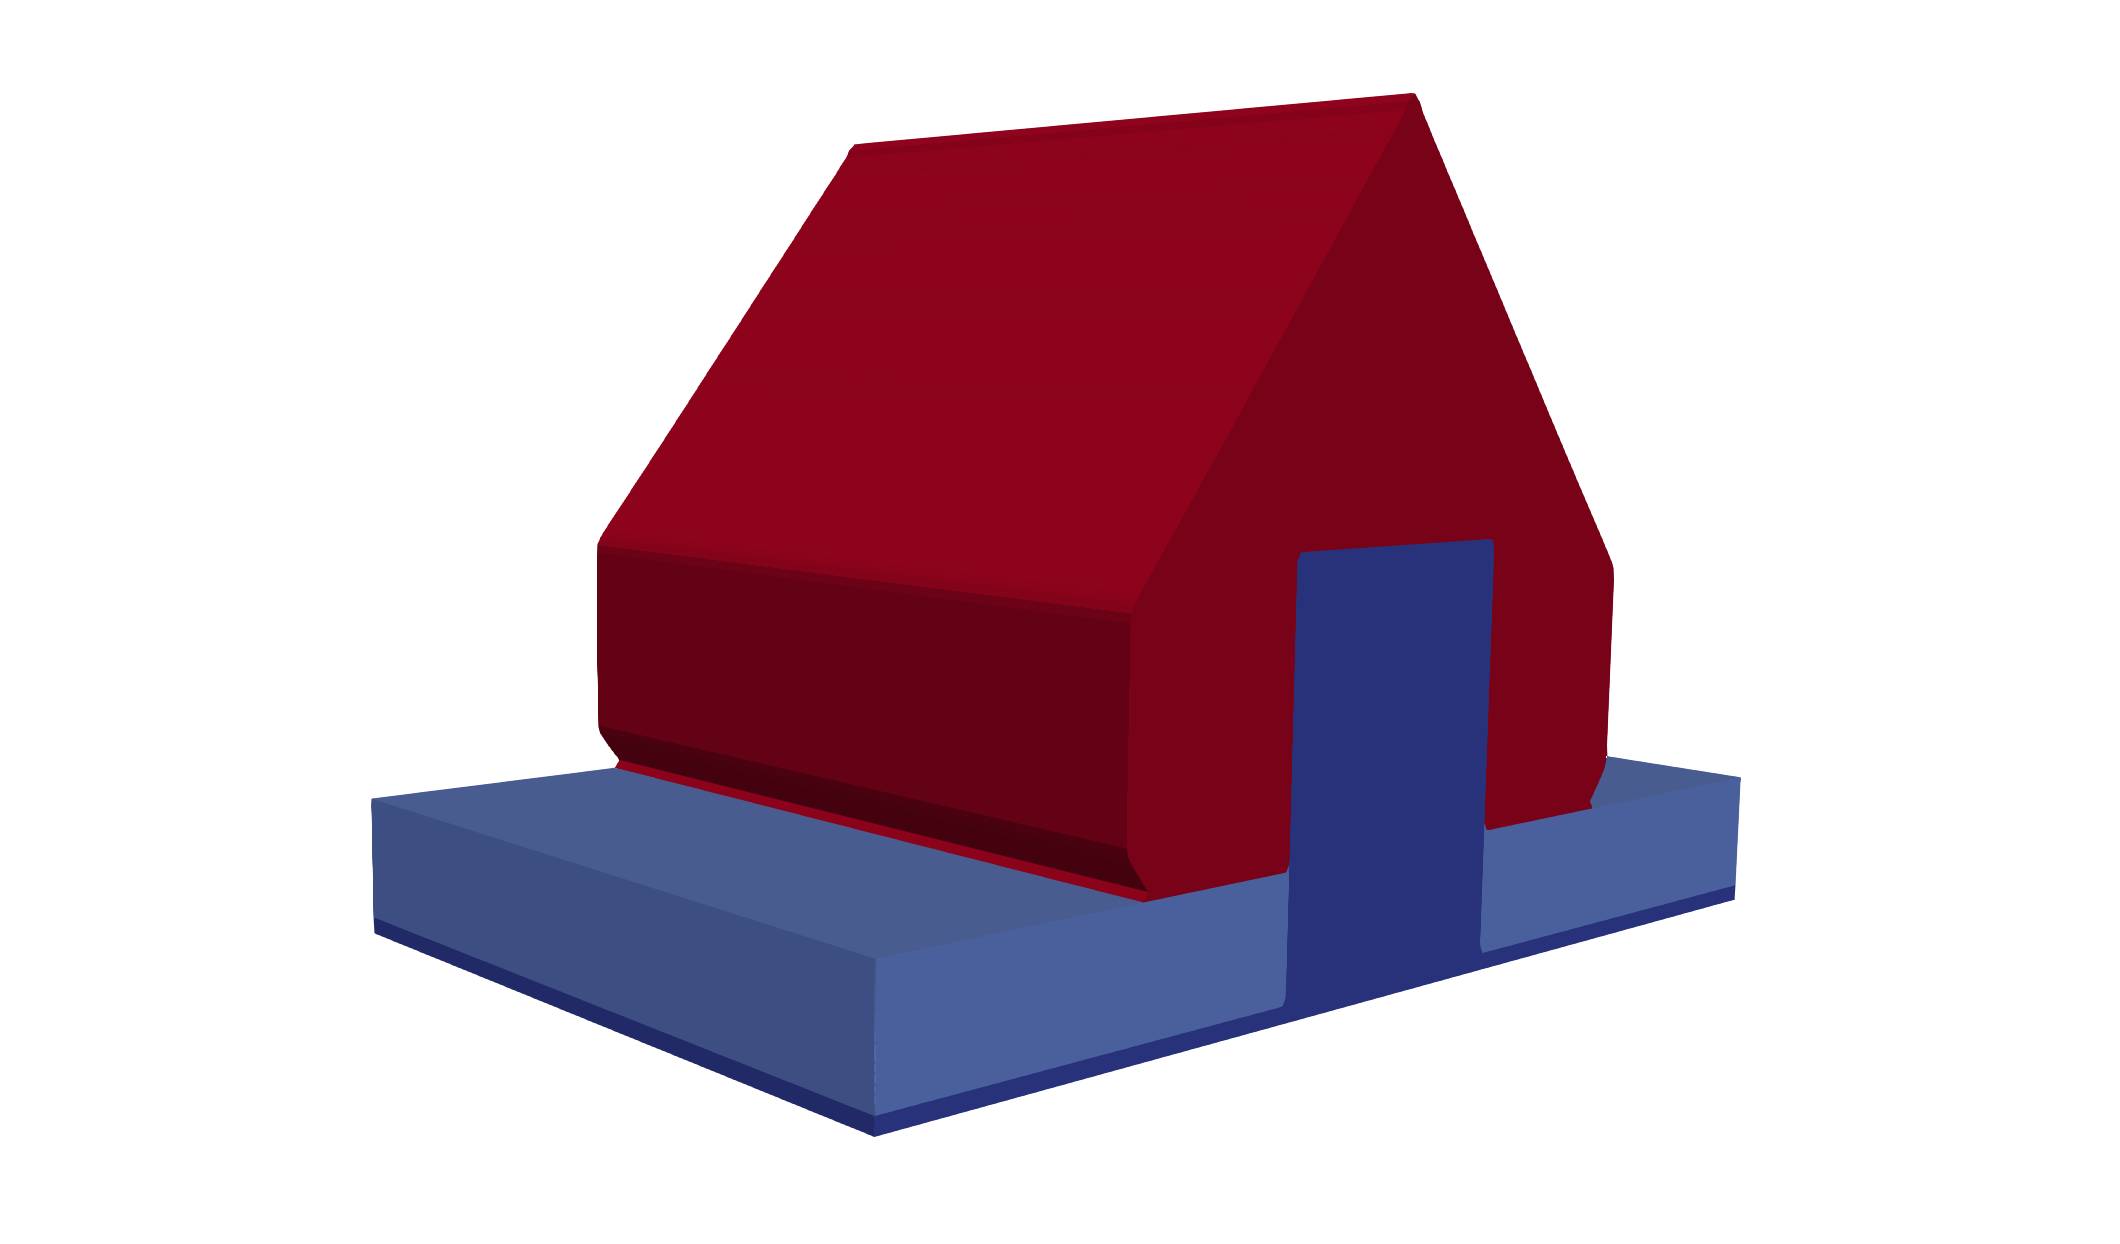
This example demonstrates the selective epitaxy process, focusing on the growth of SiGe on a Si substrate. Similar to wet etching, the process is influenced by crystallographic directions, which can be adjusted in the config.txt file. The simulation captures the growth dynamics and the resulting SiGe structure.
This example demonstrates capturing etching byproducts and the subsequent redeposition during a selective etching process in a Si3N4/SiO2 stack. The etching byproducts are captured in a cell set description of the etching plasma. To model the dynamics of these etching byproducts, a convection-diffusion equation is solved on the cell set using finite differences. The redeposition is then captured by adding up the byproducts in every step and using this information to generate a velocity field on the etched surface.
This example tests the full GDS mask import, blurring, rotation, scaling, and flipping as well as the level set conversion pipeline. Shown below is the result after applying proximity correction and extrusion on a simple test.

ViennaPS uses CTest to run its tests. In order to check whether ViennaPS runs without issues on your system, you can run:
git clone https://github.com/ViennaTools/ViennaPS.git
cd ViennaPS

cmake -B build -DVIENNAPS_BUILD_TESTS=ON
cmake --build build
ctest -E "Benchmark|Performance" --test-dir buildIf you want to contribute to ViennaPS, make sure to follow the LLVM Coding guidelines.
Make sure to format all files before creating a pull request:
cmake -B build
cmake --build build --target formatCurrent contributors: Tobias Reiter, Lado Filipovic, Roman Kostal, Noah Karnel
Contact us via: [email protected]
ViennaPS was developed under the aegis of the 'Institute for Microelectronics' at the 'TU Wien'. http://www.iue.tuwien.ac.at/
ViennaPS is licensed under the MIT License.
Some third-party libraries used by ViennaPS are under their own permissive licenses (MIT, BSD, Apache-2.0).
See THIRD_PARTY_LICENSES.md for details.